
The most common question we get after someone orders a Swedish ladder is some version of: "Is this something I can do myself?" The answer is yes — almost always. This guide walks you through the full process, including the parts that instruction manuals tend to gloss over.
Before you start: picking the right wall
This is the step most people skip, and it's the most important one. A Swedish ladder mounted to the right wall is rock solid. Mounted to the wrong wall, it becomes a safety hazard.
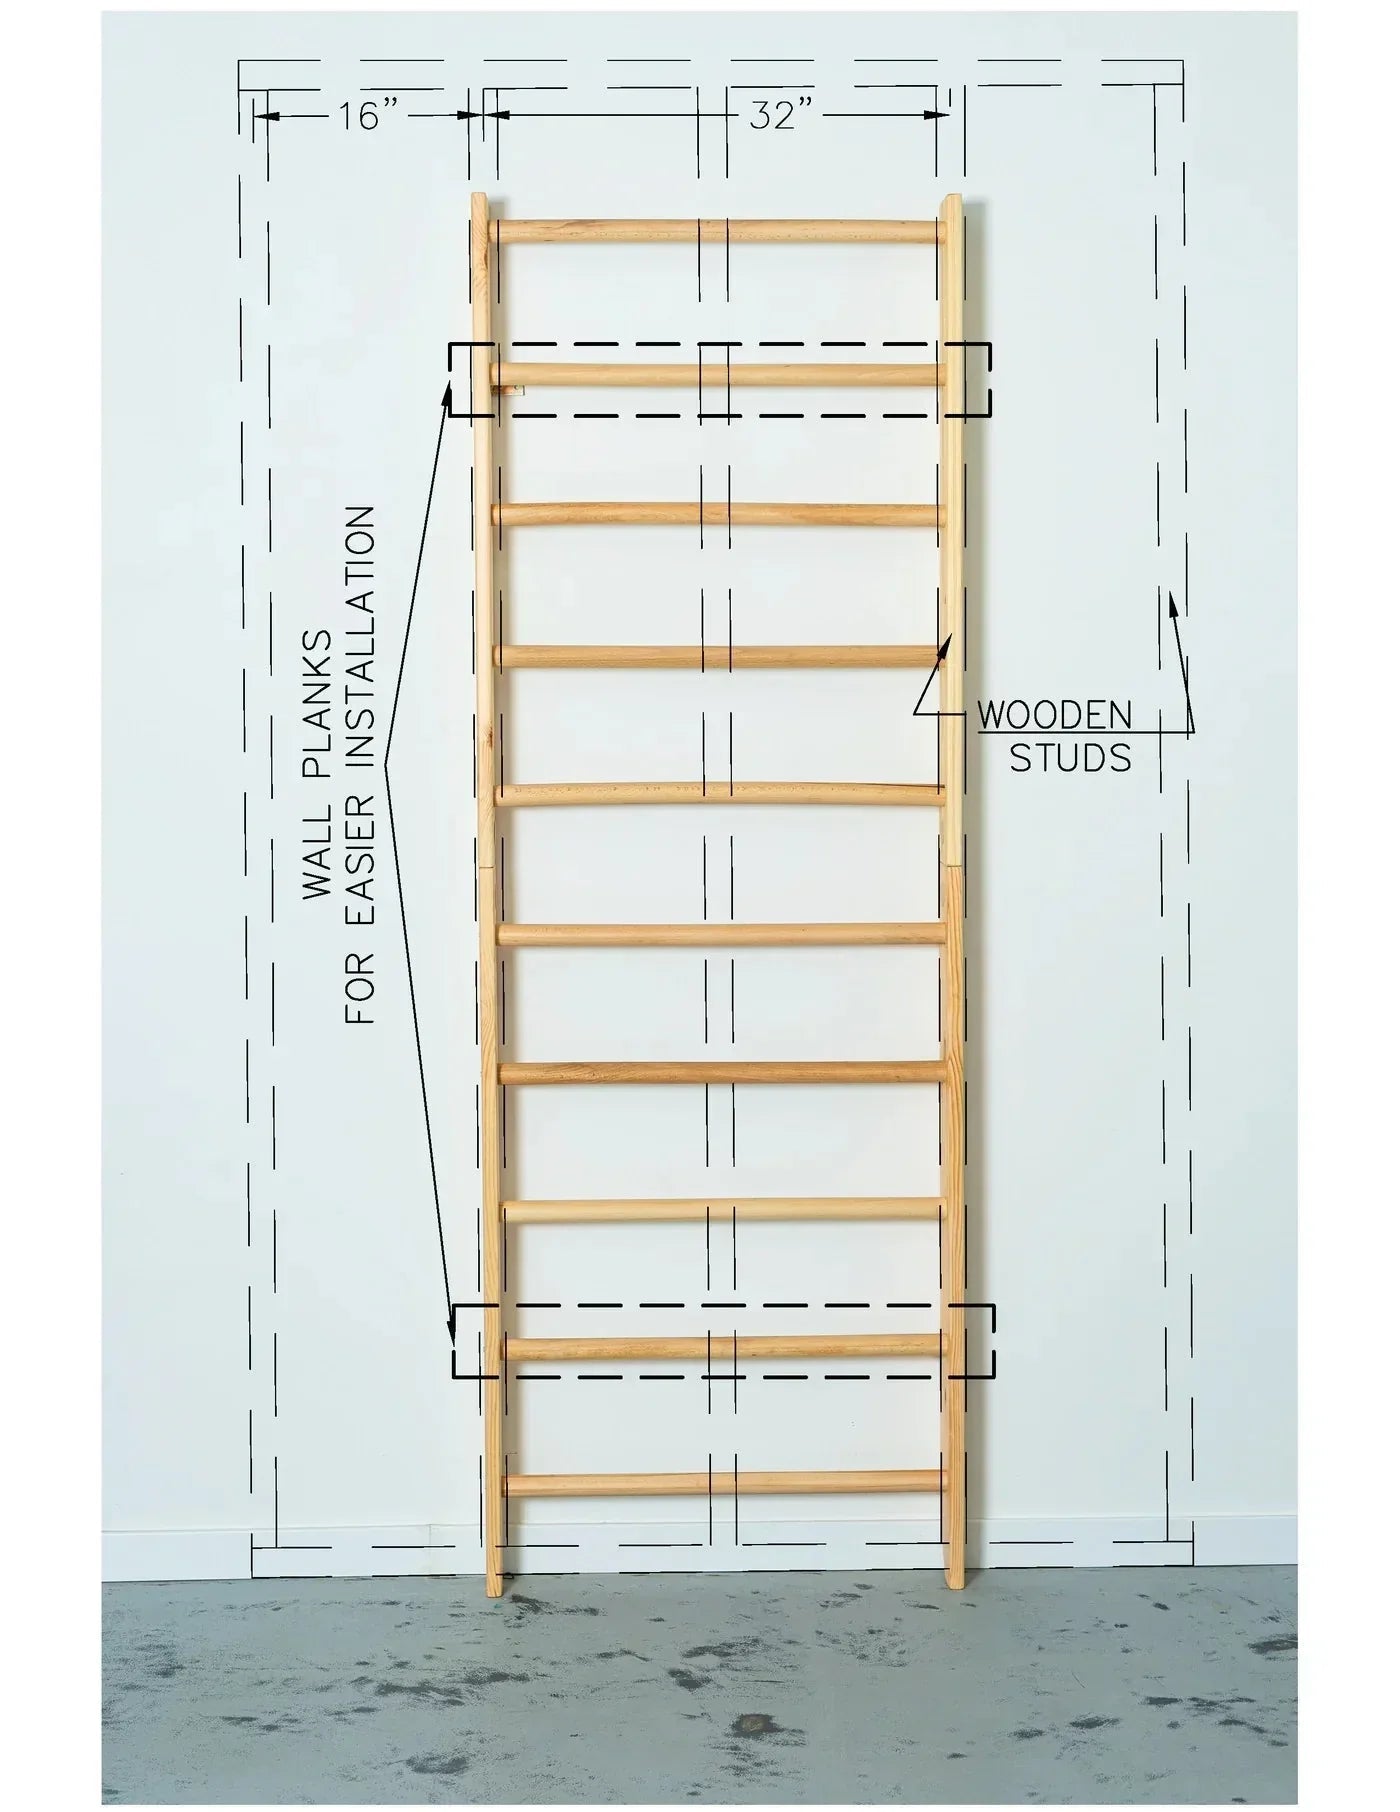
The ideal wall is a standard stud-framed interior wall. In North American homes, studs are typically spaced 16 inches apart. You need to anchor into at least two studs — ideally three if your frame width allows it. Brick and concrete walls are also excellent options and are actually easier to anchor into reliably, as long as you use the right masonry anchors and drill bit.
Avoid anchoring exclusively into drywall. Drywall alone cannot support the dynamic loads that come from someone doing pull-ups or a child climbing — even if it feels solid when you first tighten the bolts. If your studs are in awkward positions, our wall installation planks solve this exactly — they distribute the load horizontally across multiple studs so your bracket positions aren't dictated by stud locations.
What you'll need
Everything else — brackets, screws and dowels — is included in the box. Check the package contents against the list in your instruction sheet before you start so you're not hunting for a missing part halfway through.
Step-by-step installation
1. Find and mark your studs
Run your stud finder horizontally across the wall at roughly the height where your top bracket will sit. Mark each stud edge with a small pencil line, then verify by drilling a tiny pilot hole — if it goes in smoothly and feels solid, you've hit wood. If it punches straight through with no resistance, you're in drywall. Move left or right and try again.
2. Decide on height and mark your anchor points
For most adults, mounting with the top of the frame about 4-6 inches (10–15 cm) above head height works well — enough clearance for overhead hangs without feeling cramped. For children-first households, slightly lower is fine. Measure up from the floor at two points the width of your frame apart, mark the bracket positions, and use your spirit level to confirm they're perfectly horizontal. An unlevel frame is immediately visible and irritating to look at every day, so take an extra minute here.
3. Pre-drill your anchor holes
Use a drill bit slightly smaller than your anchor screws. Go straight in — don't angle. For stud walls, 2-2.5 inches (50–60 mm) depth is sufficient. For masonry, use the masonry bit and go at least 2"/50 mm deep to get past any plaster layer into solid material. Blow the dust out of the hole before inserting anchors.
4. Attach the wall brackets
Insert the wall plugs (if using), then screw your brackets in — firm but not overtightened. Overtightening into drywall around a stud can crack the surrounding material. Snug is the goal. Once both top brackets are in, hold your spirit level across them to confirm they're level before you commit.
5. Hang the frame — this is where the second person helps
Have one person hold the frame against the wall while the other locates and secures the top connections. Once the top is attached and stable the rest is straightforward. Work your way down, connecting each mounting point in sequence. Don't fully tighten anything until all connection points are in place — slight adjustability at this stage lets you make small alignment corrections.
6. Final tighten and load test
Go through every bolt and screw and give it a final firm tighten. Then load test before your kids or yourself get anywhere near it — grab the top rung with both hands and apply your full body weight. Hang. Give it a gentle swing. If anything moves, creaks more than wood naturally does, or feels loose, find the culprit before using it.
If you hear a loud creak during the load test, stop and check the anchor points. A small amount of wood-on-wood creaking from the frame itself is completely normal — it's the same sound a hardwood floor makes. What you're listening for is movement at the wall connection points.
Tips from people who've done it
"Install it slightly higher than you think you want it. You'll appreciate the overhead clearance once you start doing pull-ups and hanging exercises." — Marcus, customer from the US
"If your studs don't line up with the bracket positions, get the optional wall planks. They make the whole thing much simpler and you stop worrying about whether you've hit solid wood." — Katelin, customer from the UK
"Put masking tape on the wall before marking with pencil — it protects the paint and the lines are easier to see. Remove it once the brackets are in." — DIY tip from our installation team
Common questions
Can I install it on a plasterboard/drywall wall with no studs in the right place?
Yes, but use our wall installation planks. These horizontal boards span across multiple studs and give you a solid continuous mounting surface. Don't try to anchor into drywall alone — wall plugs rated for plasterboard exist, but they're not designed for this kind of repeated dynamic load.
Do I need a professional to install it?
For most people, no. If you've hung a heavy shelf, installed a TV bracket, or done any basic home improvement work, you have the skills. The one exception is if you're genuinely unsure about your wall type — in that case a handyperson can assess it quickly and either do the install or confirm you're good to go yourself.
How do I know if I've hit a stud?
A stud finder is the easiest method. If you don't have one, you can use the knock test — knock along the wall and listen for the sound to change from hollow to solid. Then confirm with a small pilot hole. The drill will feel noticeably more resistance when it hits wood versus floating in air behind drywall.
Can it go on an exterior wall?
Yes, though exterior walls often have insulation between the studs which means your anchors go into narrower framing. It works fine — just be aware that exterior wall construction varies more than interior walls, so take extra care confirming stud positions.
Questions about your specific installation? Our support team is available 7 days a week — average response time is under 24 hours.
info@cleverwood.shop